Vauxhall Calibra 2.0 1995 cambelt change instructions and replacement inteval. Full guide!
Special tools
- None required.
Special precautions
- Disconnect battery earth lead.
- DO NOT turn crankshaft or camshaft when timing belt removed.
- Remove spark plugs to ease turning engine.
- Turn engine in normal direction of rotation (unless otherwise stated).
- DO NOT turn engine via camshaft or other sprockets.
- Observe all tightening torques.
Repair times – hrs
| Camshaft drive belt/chain – R & I | 1,20 |
| Camshaft drive belt/chain, AC – R & I | 1,40 |
Valve timing procedures
Removal
- Raise and support front of vehicle.
- Turn auxiliary drive belt tensioner clockwise to release tension on belt. Use ring spanner.
- 2,0 – except Frontera:
- Disconnect intake air temperature (IAT) sensor multi-plug.
- Disconnect mass air flow (MAF) sensor multi-plug.
- Remove:
- RH front wheel.
- RH splash guard.
- Air intake trunking.
- Air filter housing.
- RH engine mounting torque reaction link.
- All models – remove:
- Auxiliary drive belt.
- Frontera: Cooling fan viscous coupling bolt (LH thread).
- Frontera: Cooling fan, viscous coupling and pulley.
- Crankshaft pulley bolts (4 bolts) [7] .
- Crankshaft pulley.
- Timing belt upper cover.
- Timing belt lower cover.
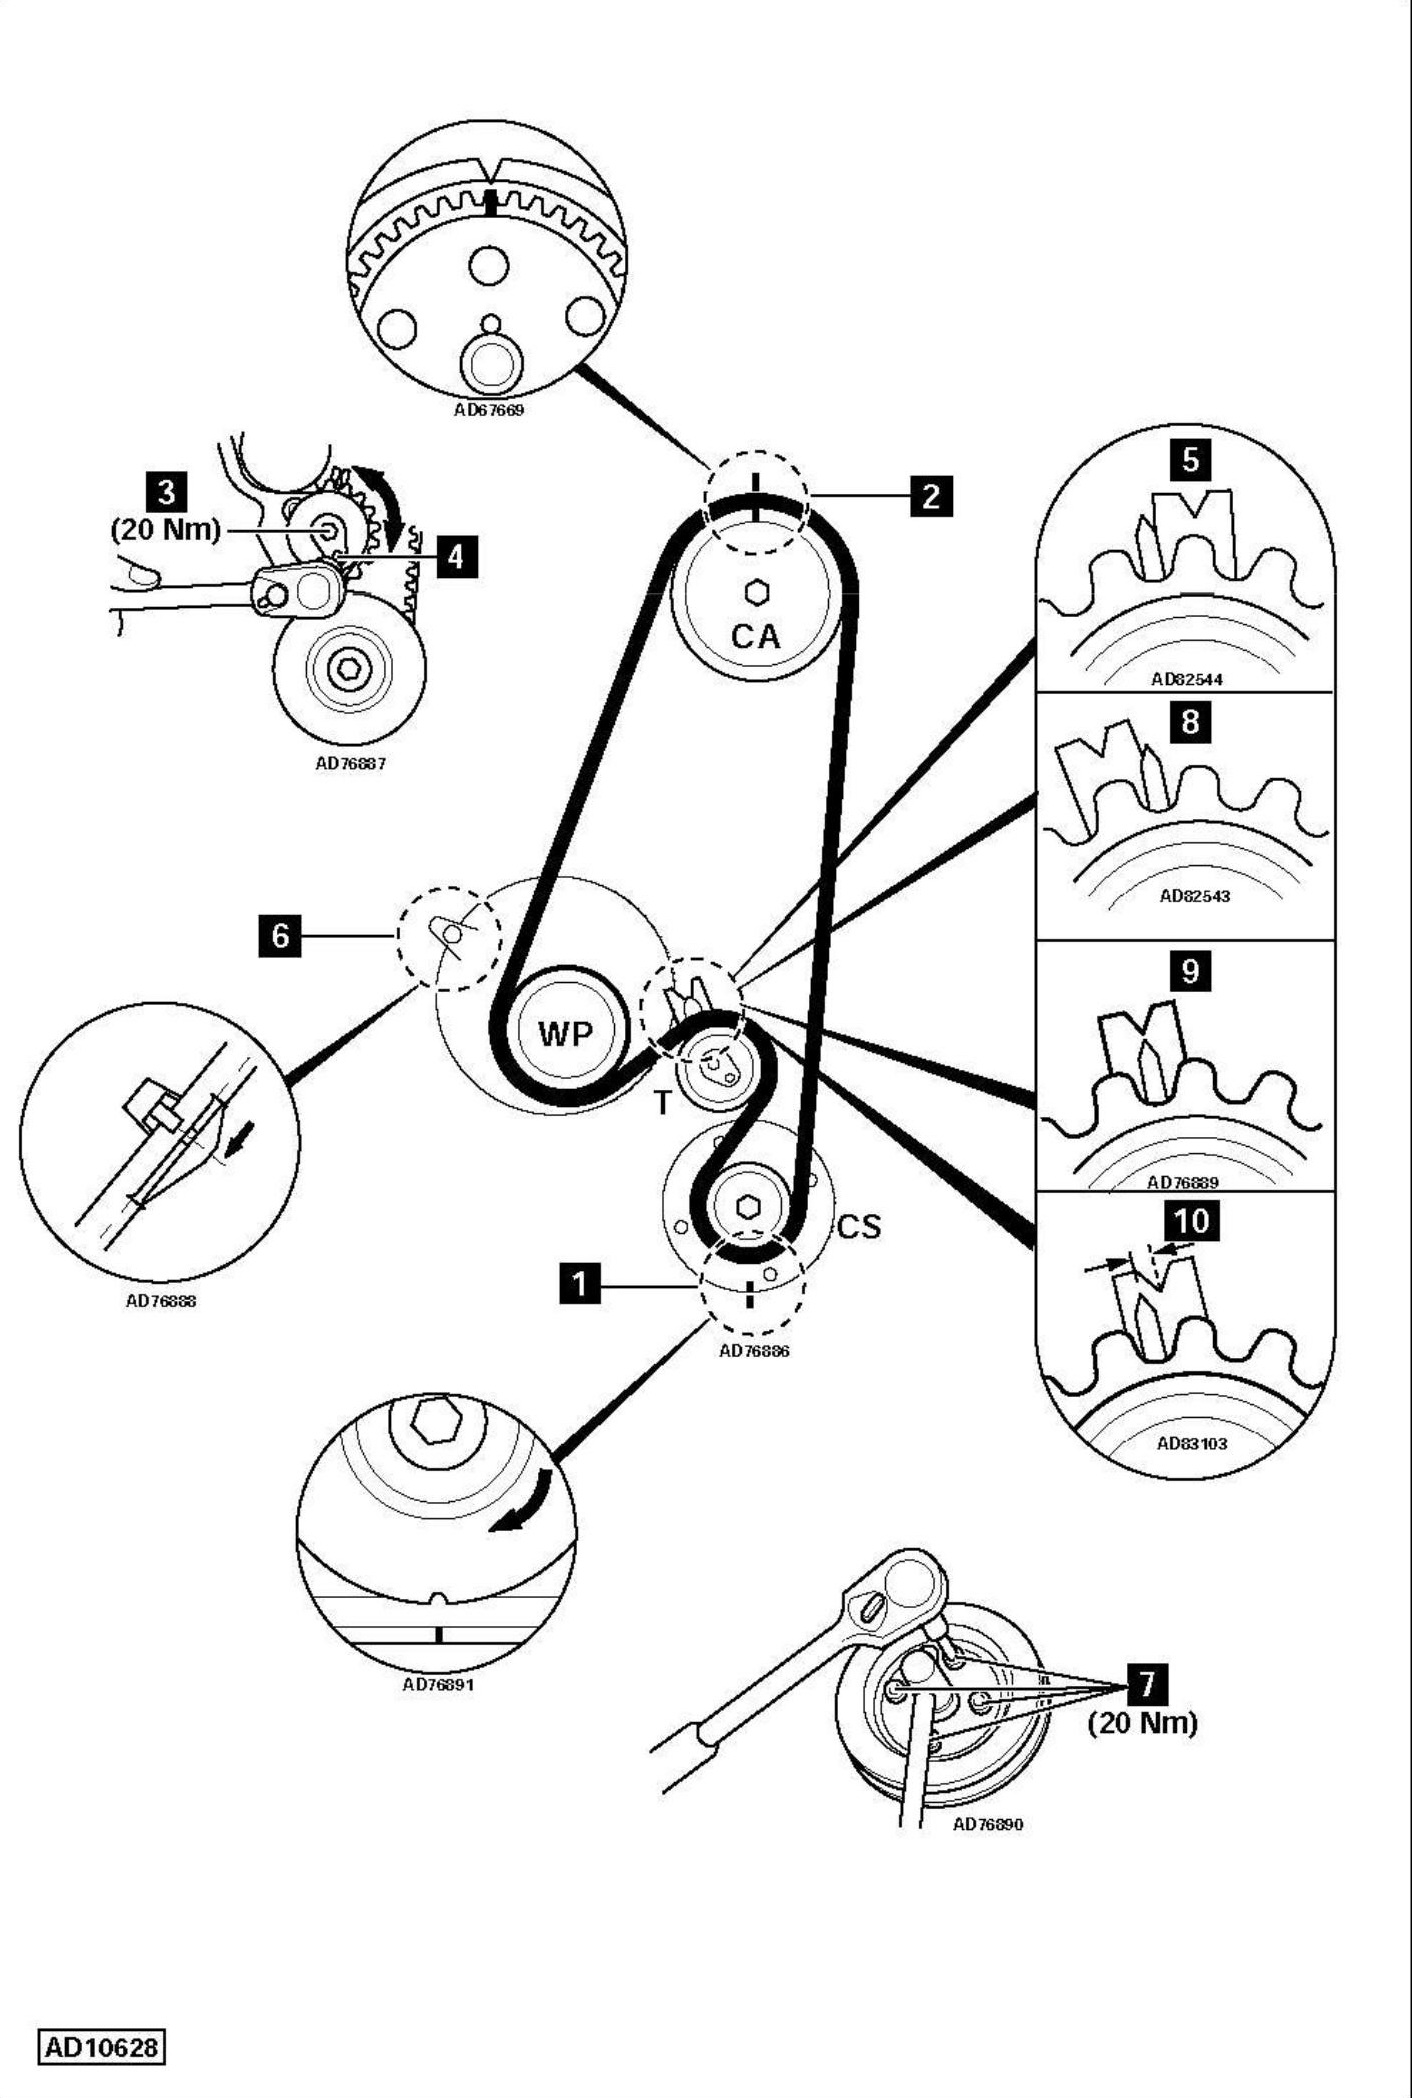
- Turn crankshaft clockwise until TDC mark on crankshaft pulley aligned with mark on oil pump housing [1] .
- Mark on camshaft sprocket must be aligned with mark on timing belt cover backplate [2] .
- Slacken tensioner bolt [3] .
- Turn tensioner clockwise until pointer on LH stop [5] . Use Allen key [4] .
- Lightly tighten tensioner bolt [3] .
Installation
- Ensure timing marks aligned [1] & [2] .
- Fit timing belt. Ensure belt is taut between crankshaft sprocket and camshaft sprocket.
- Ensure lug on water pump aligned with corresponding lug on cylinder block [6] .
- Slacken tensioner bolt [3] .
- Turn tensioner anti-clockwise until pointer on RH stop [8] .
- Tighten tensioner bolt [3] .
- Turn crankshaft two turns clockwise. Ensure timing marks aligned [1] & [2] .
- Slacken tensioner bolt [3] .
- Turn tensioner clockwise until pointer aligned with:
- ‘V’ notch in bracket (new belt) [9] .
- LH edge of ‘V’ notch (used belt) [10] .
- Turn crankshaft two turns clockwise. Ensure timing marks aligned [1] & [2] .
- Check pointer aligned with ‘V’ notch in bracket [9] .
- If not: Repeat tensioning procedure.
- Tighten tensioner bolt to 20 Nm [3] .
- Install components in reverse order of removal.
- Tighten crankshaft pulley bolts to 20 Nm [7] .
- Frontera: Tighten cooling fan viscous coupling bolt (LH thread). Tightening torque: 26 Nm.