Hyundai Santa Fe 2.0D CRDi 2002 cambelt change instructions and replacement inteval. Full guide!
Special tools
- None required.
Special precautions
- Disconnect battery earth lead.
- DO NOT turn crankshaft or camshaft when timing belt removed.
- Remove spark plugs to ease turning engine.
- Turn engine in normal direction of rotation (unless otherwise stated).
- DO NOT turn engine via camshaft or other sprockets.
- Observe all tightening torques.
Repair times – hrs
| Camshaft drive belt/chain – R & I | 4,80 |
| Camshaft drive belt/chain, AC – R & I | 5,00 |
Valve timing procedures
Removal
NOTE: Santa Fe – Due to limited space within the engine compartment it may be necessary to remove the engine from the vehicle or the gearbox mounting and left-hand side driveshaft to enable sufficient access to the timing belt.
- Raise and support front of vehicle.
- i30 – remove:
- RH front wheel.
- RH splash guard.
- All models – remove:
- Engine top cover.
- Auxiliary drive belt.
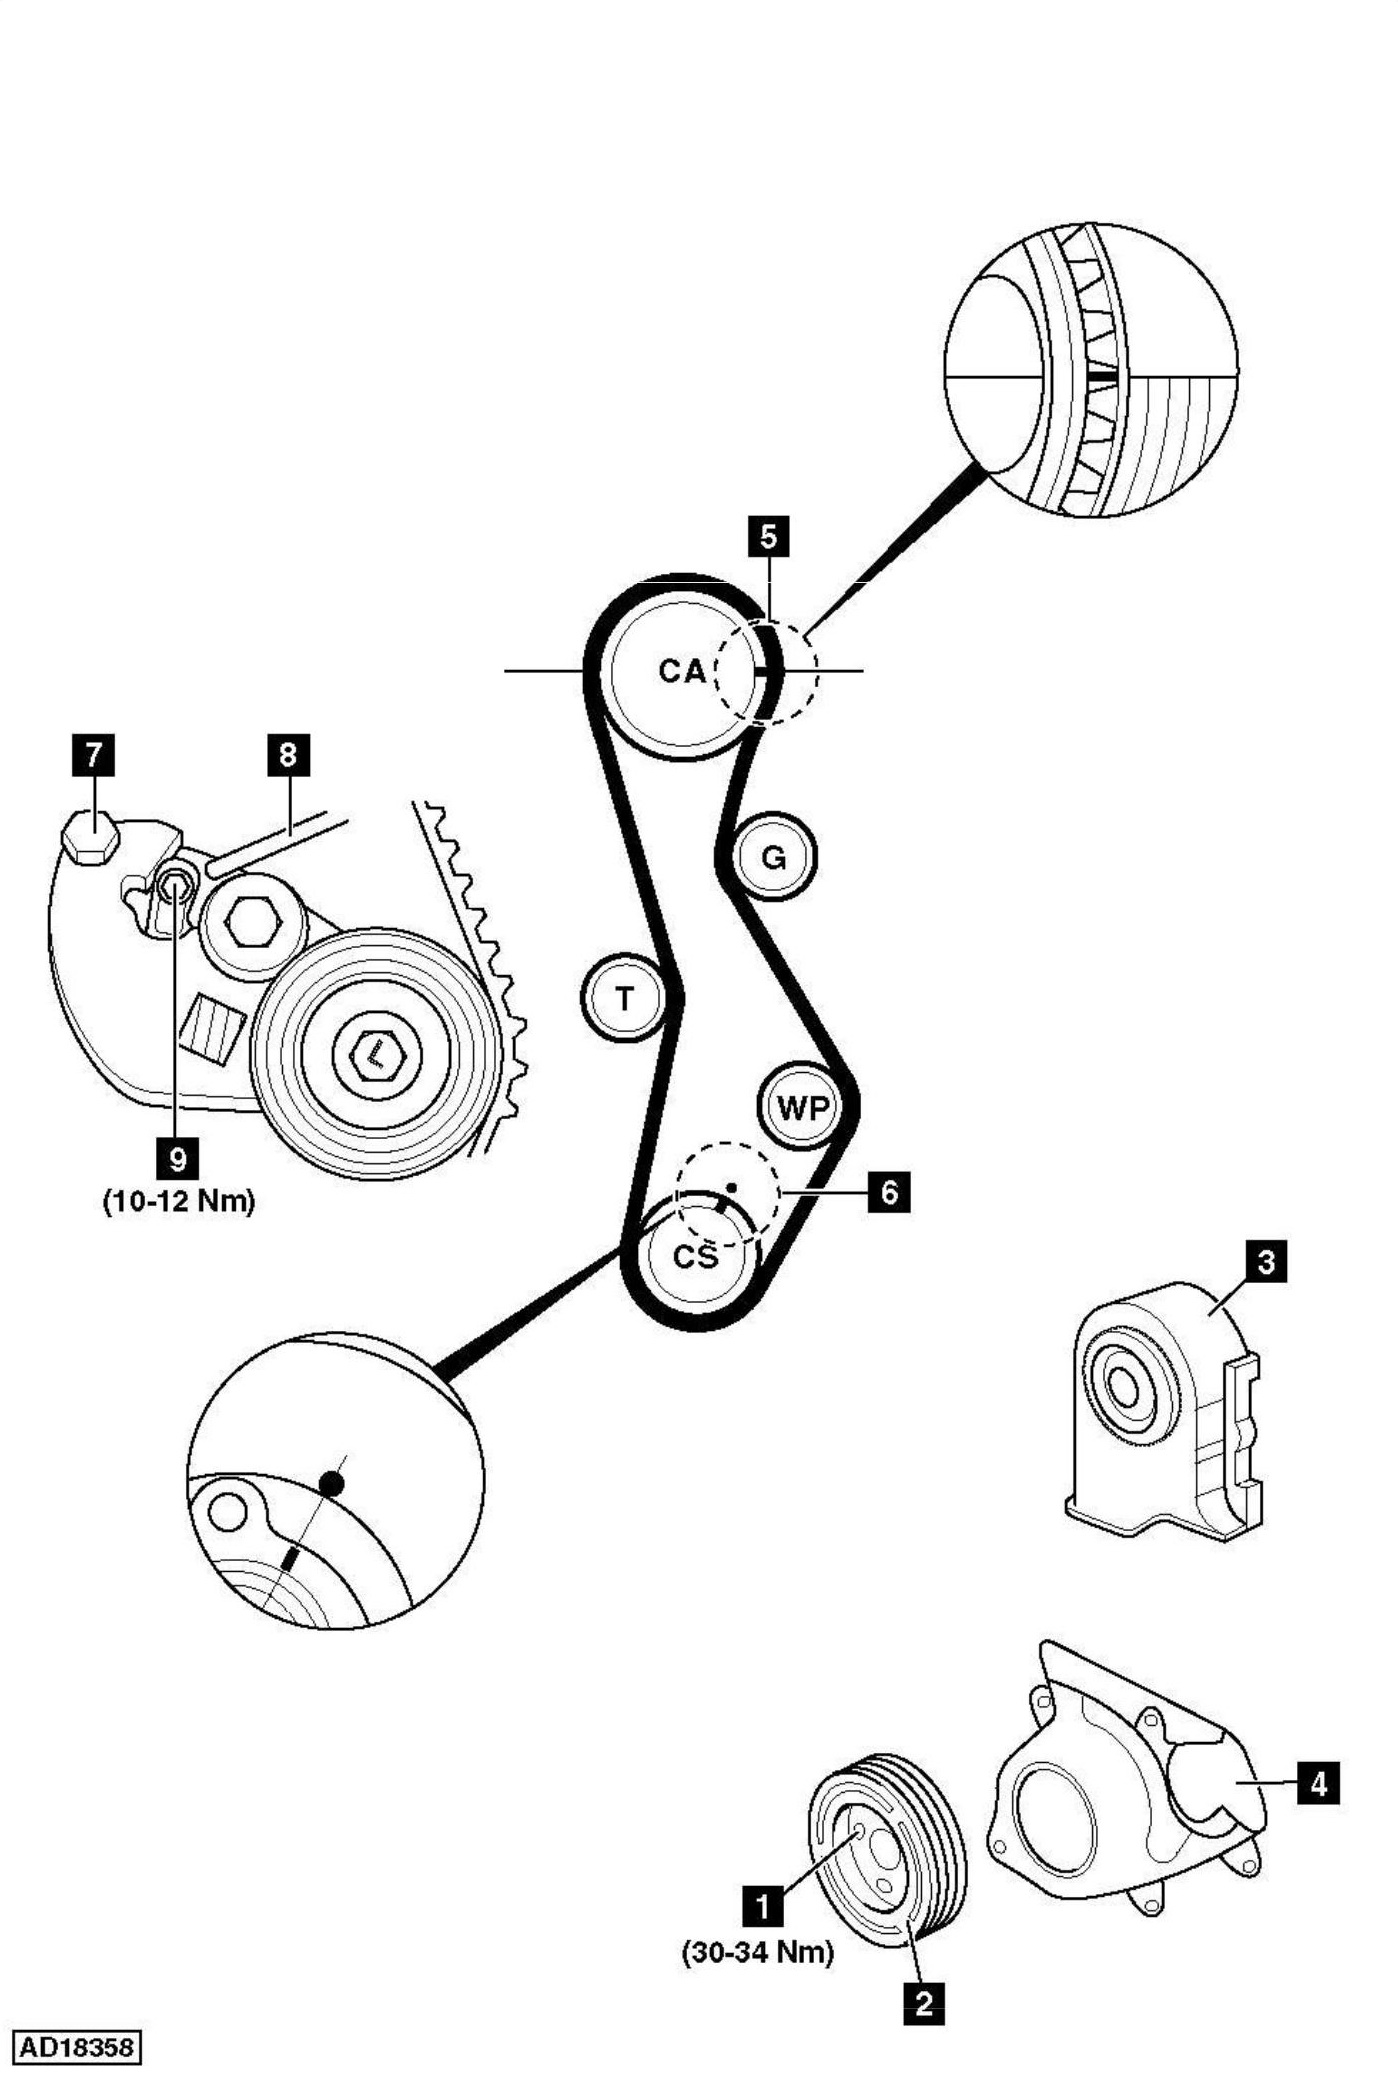
- Crankshaft pulley bolts [1] .
- Crankshaft pulley [2] .
- Timing belt covers [3] & [4] .
- Support engine.
- Remove:
- RH engine mounting.
- RH engine mounting bracket.
- Turn crankshaft clockwise to TDC on No.1 cylinder. Ensure timing marks aligned [5] & [6] .
- Turn tensioner until locking pin can be inserted [8] . Use bolt [7] .
- Slacken bolt [9] . Use Allen key.
- Turn tensioner clockwise until it touches stop. Use bolt [7] .
- Tighten bolt [9] .
- Remove timing belt.
NOTE: Mark direction of rotation on belt with chalk if belt is to be reused.
Installation
- Check tensioner body for leakage or damage. Replace if necessary.
- Ensure timing marks aligned [5] & [6] .
- Fit timing belt in following order:
- Crankshaft sprocket.
- Water pump sprocket.
- Guide pulley.
- Camshaft sprocket.
- Tensioner pulley.
- Ensure belt is taut between sprockets on non-tensioned side.
NOTE: Observe direction of rotation marks on belt. - Slacken bolt [9] .
- Turn crankshaft slowly two turns clockwise.
- Ensure timing marks aligned [5] & [6] .
- Tighten bolt to 10-12 Nm [9] .
- Remove locking pin from tensioner plate [8] .
- Install components in reverse order of removal.
- Tighten crankshaft pulley bolts [1] . Tightening torque: 30-34 Nm.